

Notifyer System Integration with n8n

Automate your WhatsApp messaging workflows with n8n and Notifyer System
Prerequisites
Before getting started, make sure you have:Notifyer System Account
n8n Account
Setting up your Notifyer System account
Complete the Embedding Process
Set up message templates
Option A: Template messages
Option A: Template messages
WhatsApp templates are pre-approved message formats that allow for personalization while maintaining compliance with WhatsApp policies.
Navigate to Templates
Create Template
Fill out the form
{{1}}, {{2}} format for personalizationSubmit for review
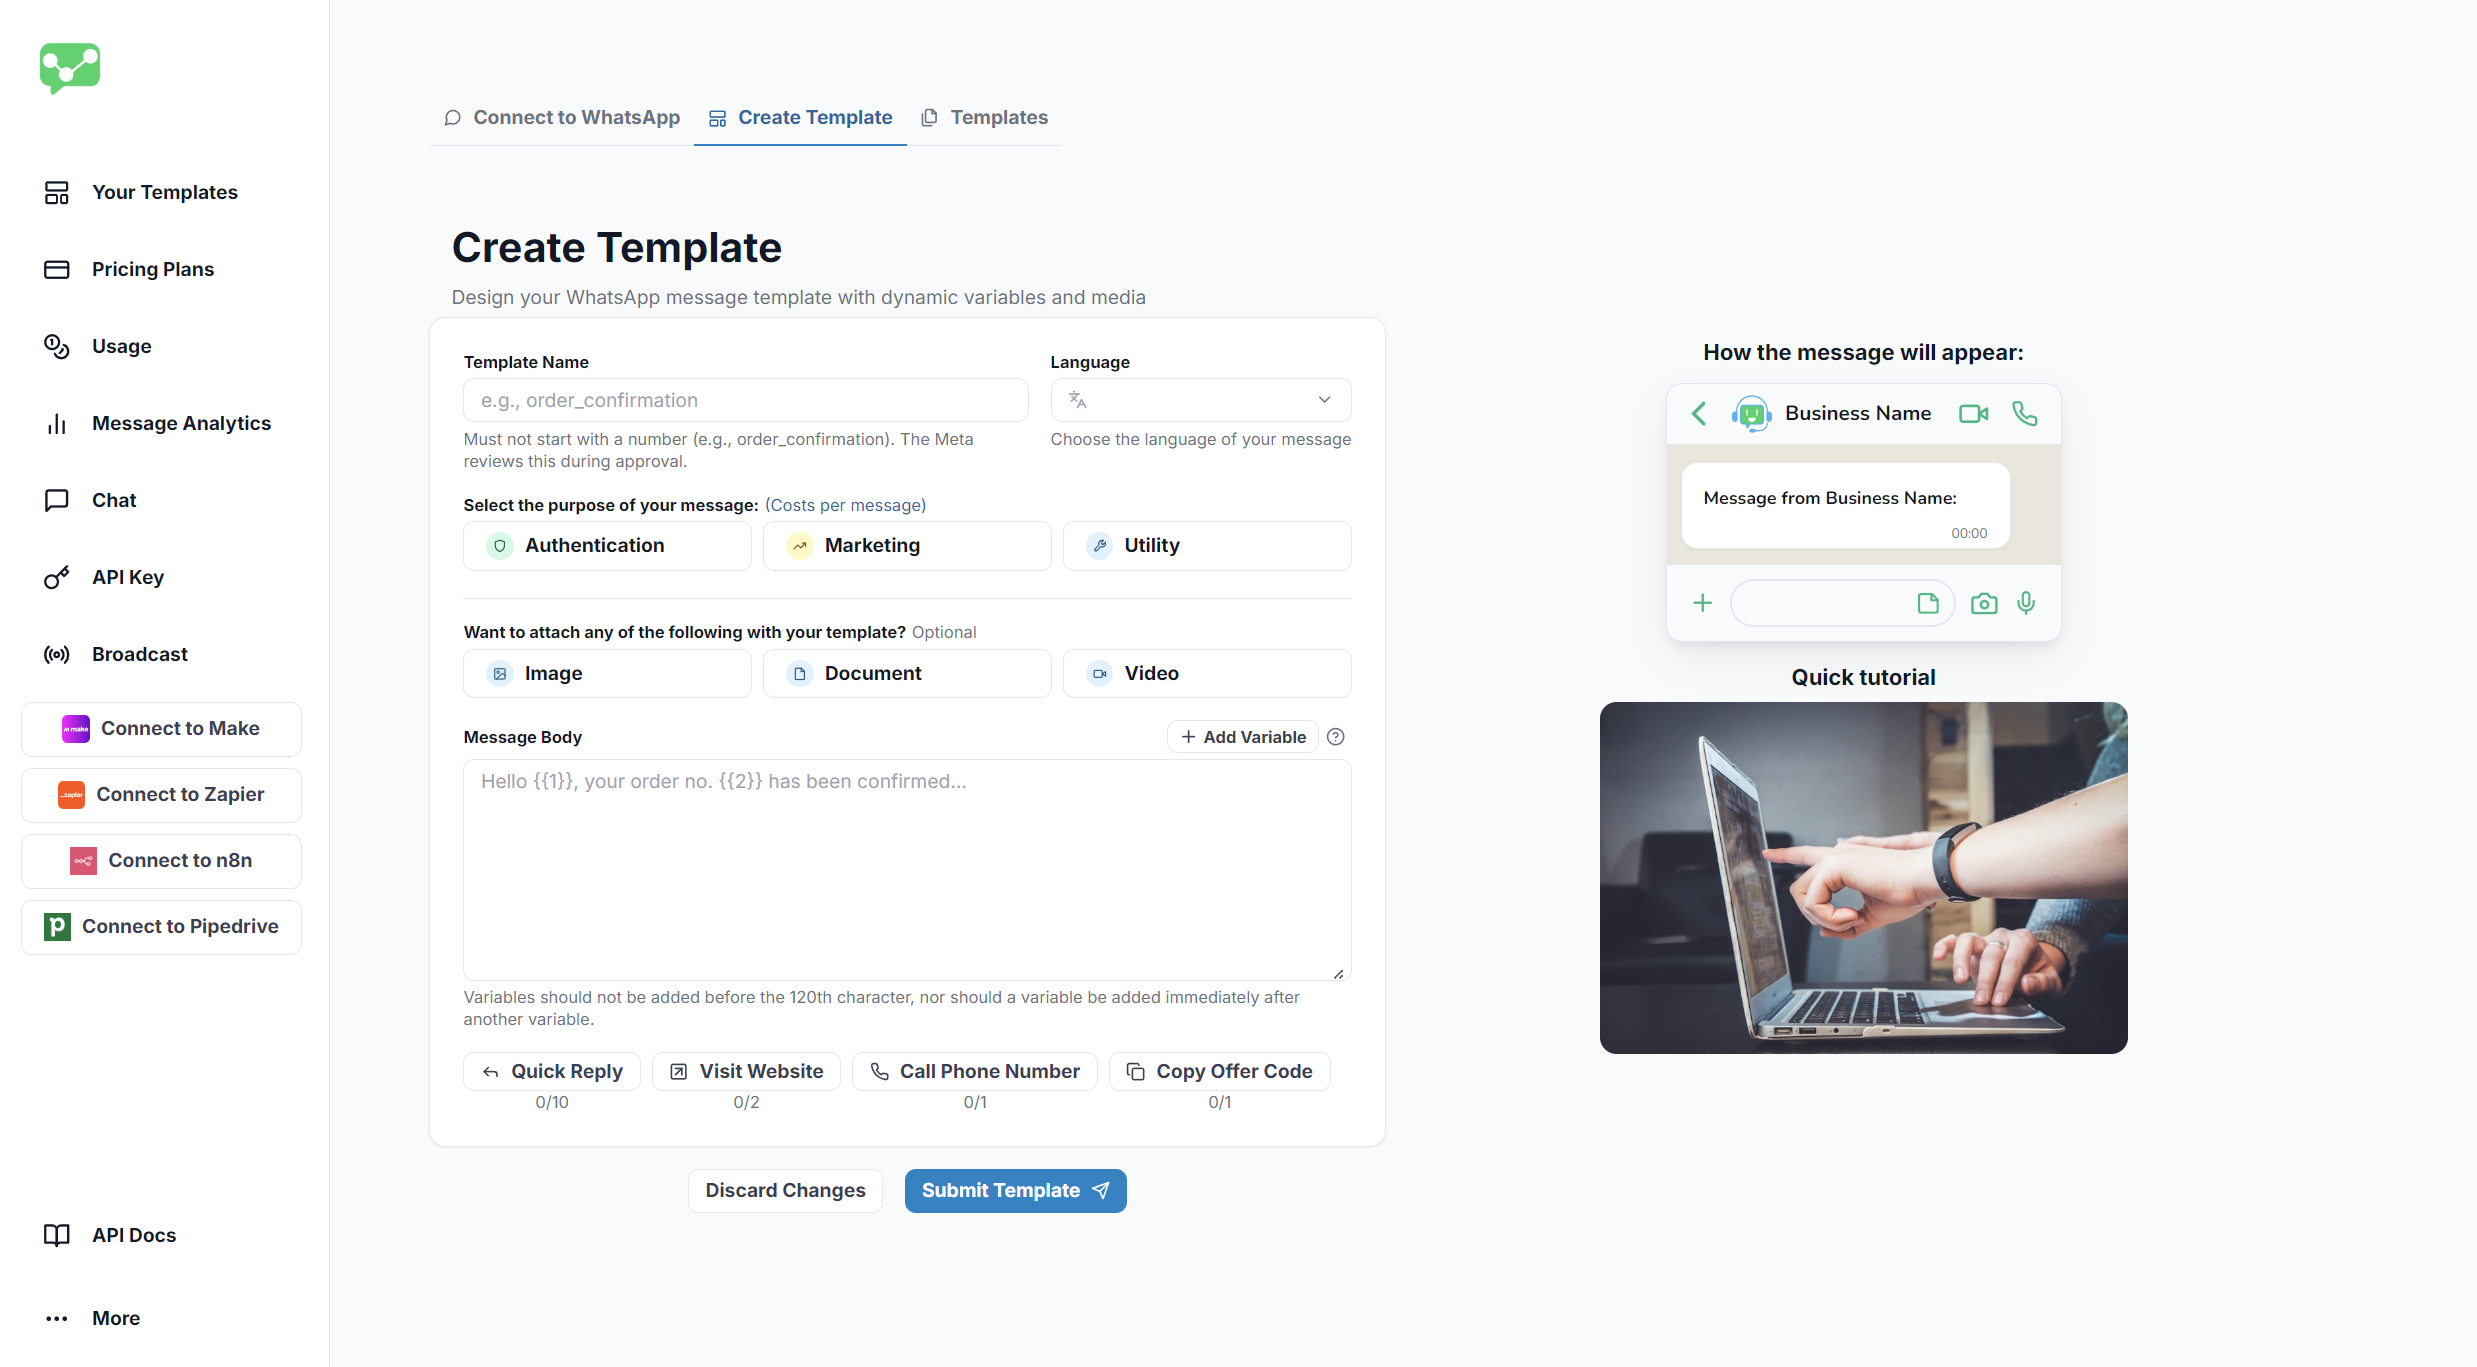
Template Creation Interface
Option B: Non-template messages
Option B: Non-template messages
For simpler communications, you can send non-template messages that include:
Text
Images
Documents
Videos
Get your API key
- In your Notifyer dashboard, navigate to API Keys
- Copy your unique API key
- Store it securely—you’ll need it for the integration
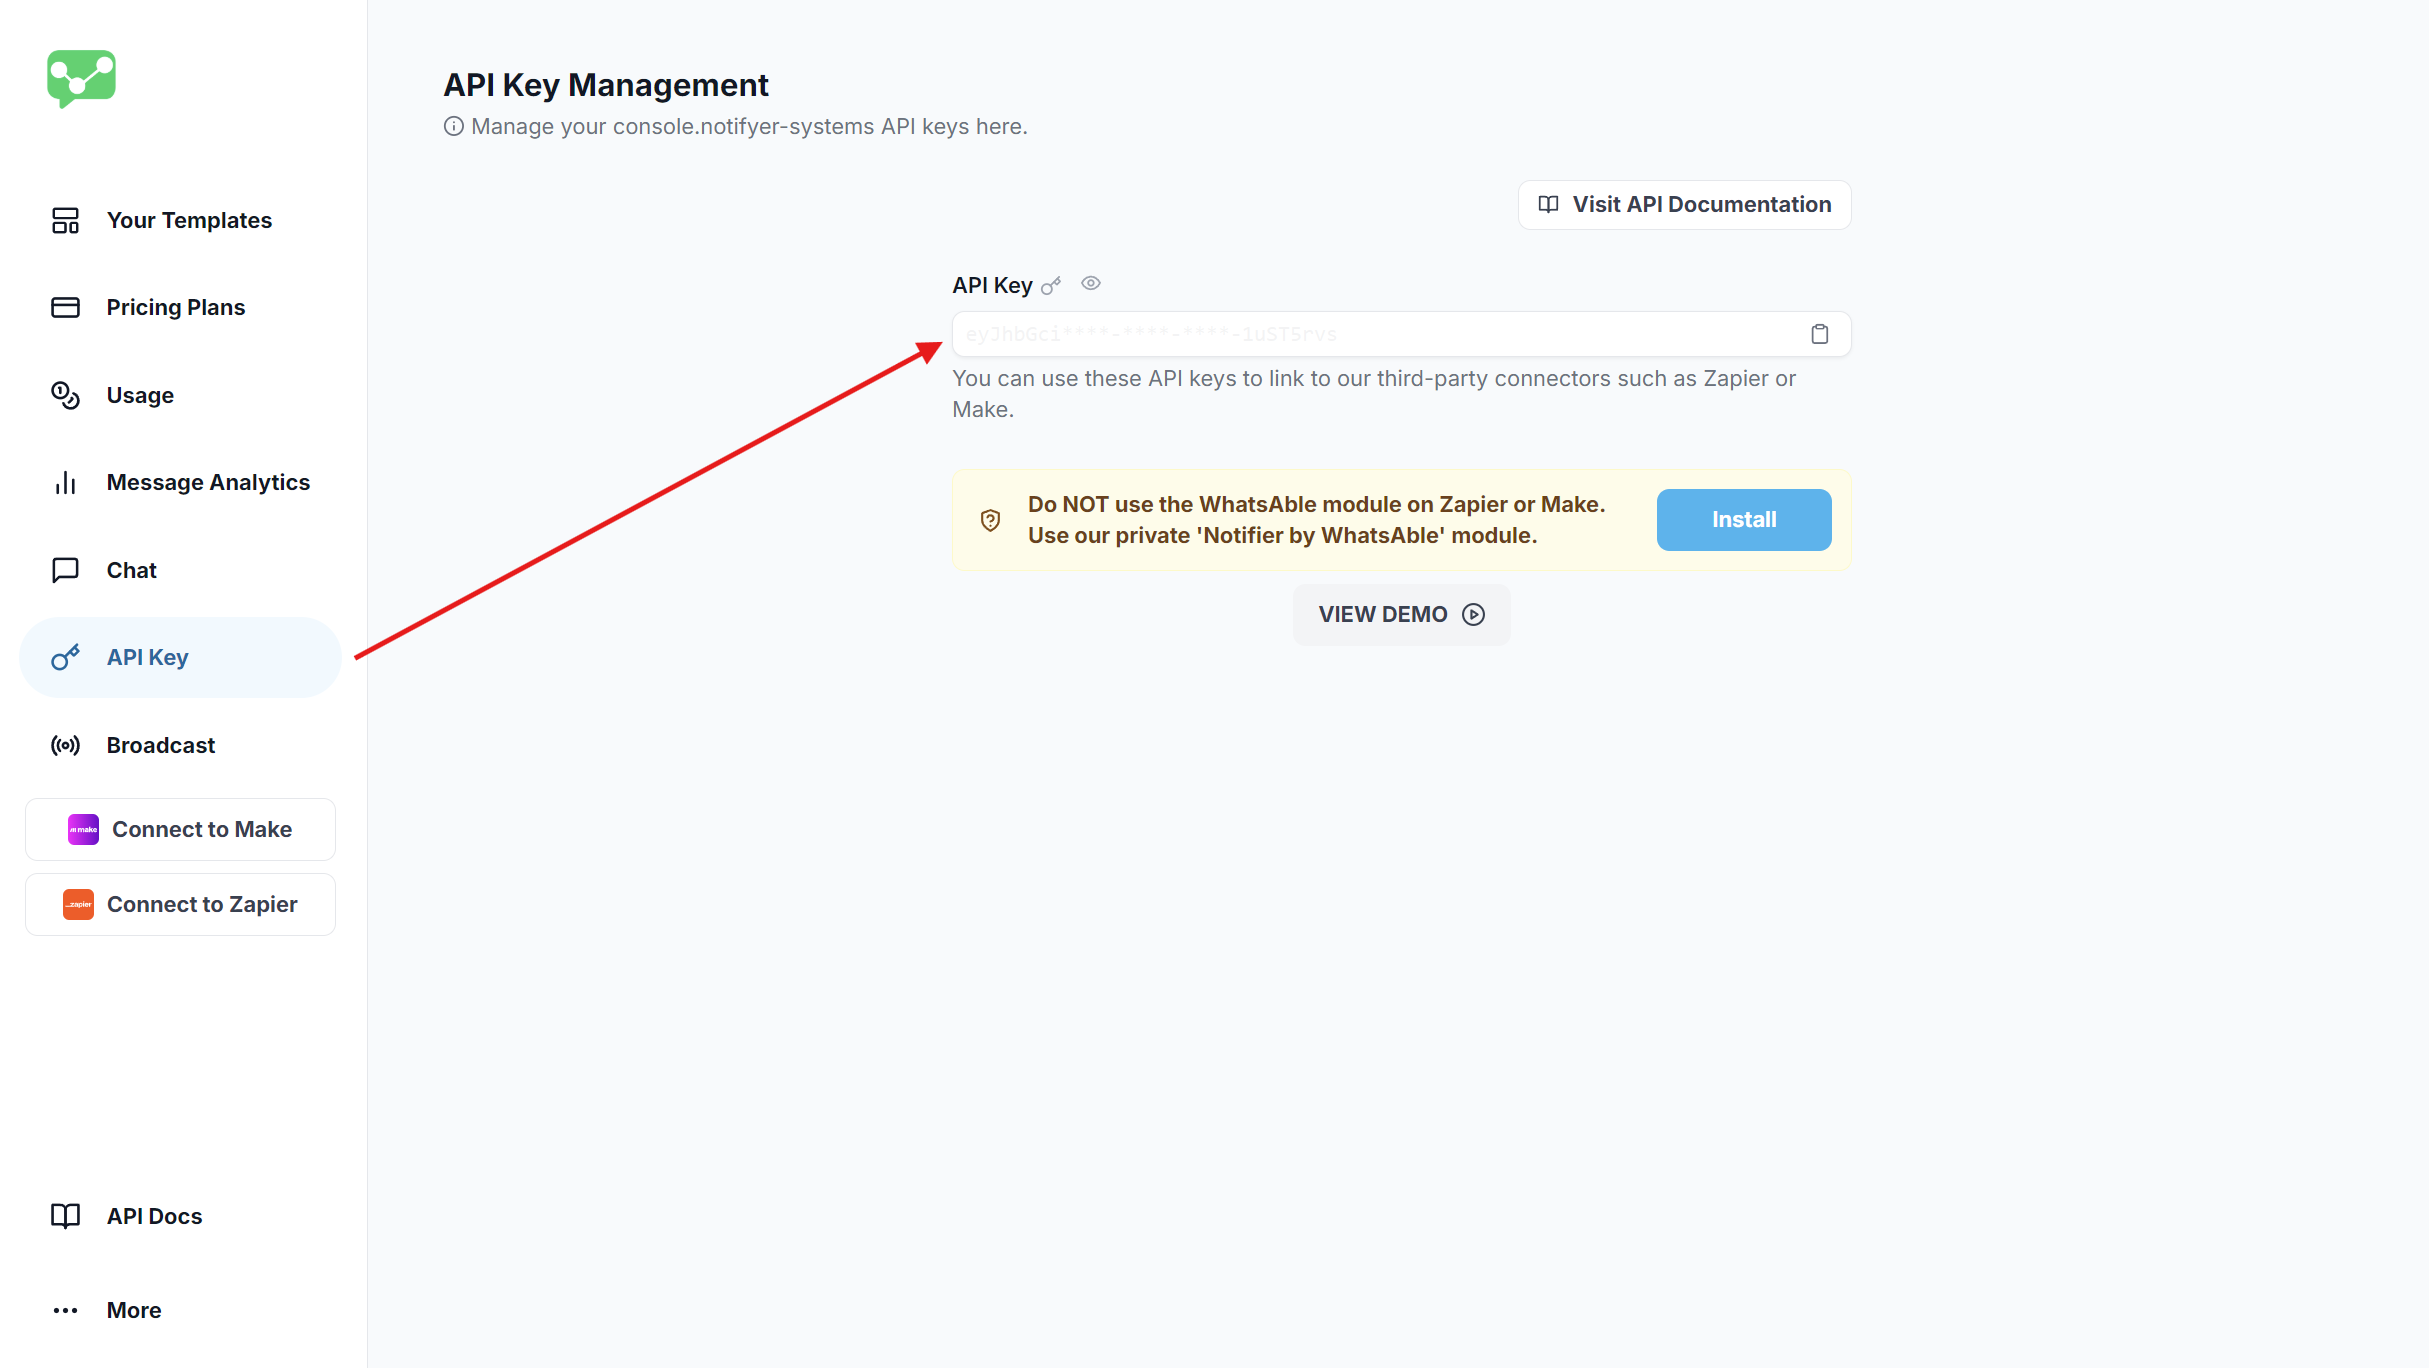
API Key Location
Integrating with n8n
Introducing the New Features of N8N Nodes Version 2.3.3
Set up your n8n workflow
- Log in to your n8n account
- Create a new workflow by clicking Create Workflow
- Add a trigger node of your choice:
- Popular triggers include Google Forms, Jotform, ClickUp, or a Schedule trigger
- Connect and configure your trigger according to your use case
WhatsAble trigger node (incoming and outgoing)
WhatsAble trigger node (incoming and outgoing)
Add WhatsAble trigger node
- Click the + button in your workflow canvas to add a new node
- Search for “WhatsAble” in the node library search bar
- Select the node displaying the official WhatsAble logo
- From the available trigger options, choose On new Incoming message event. That is the node’s label — when outgoing is enabled (credential Notifyer System incoming and outgoing messages), the same trigger also fires for outgoing messages, including replies typed in the WhatsApp Business app. Filter with
incoming_message.
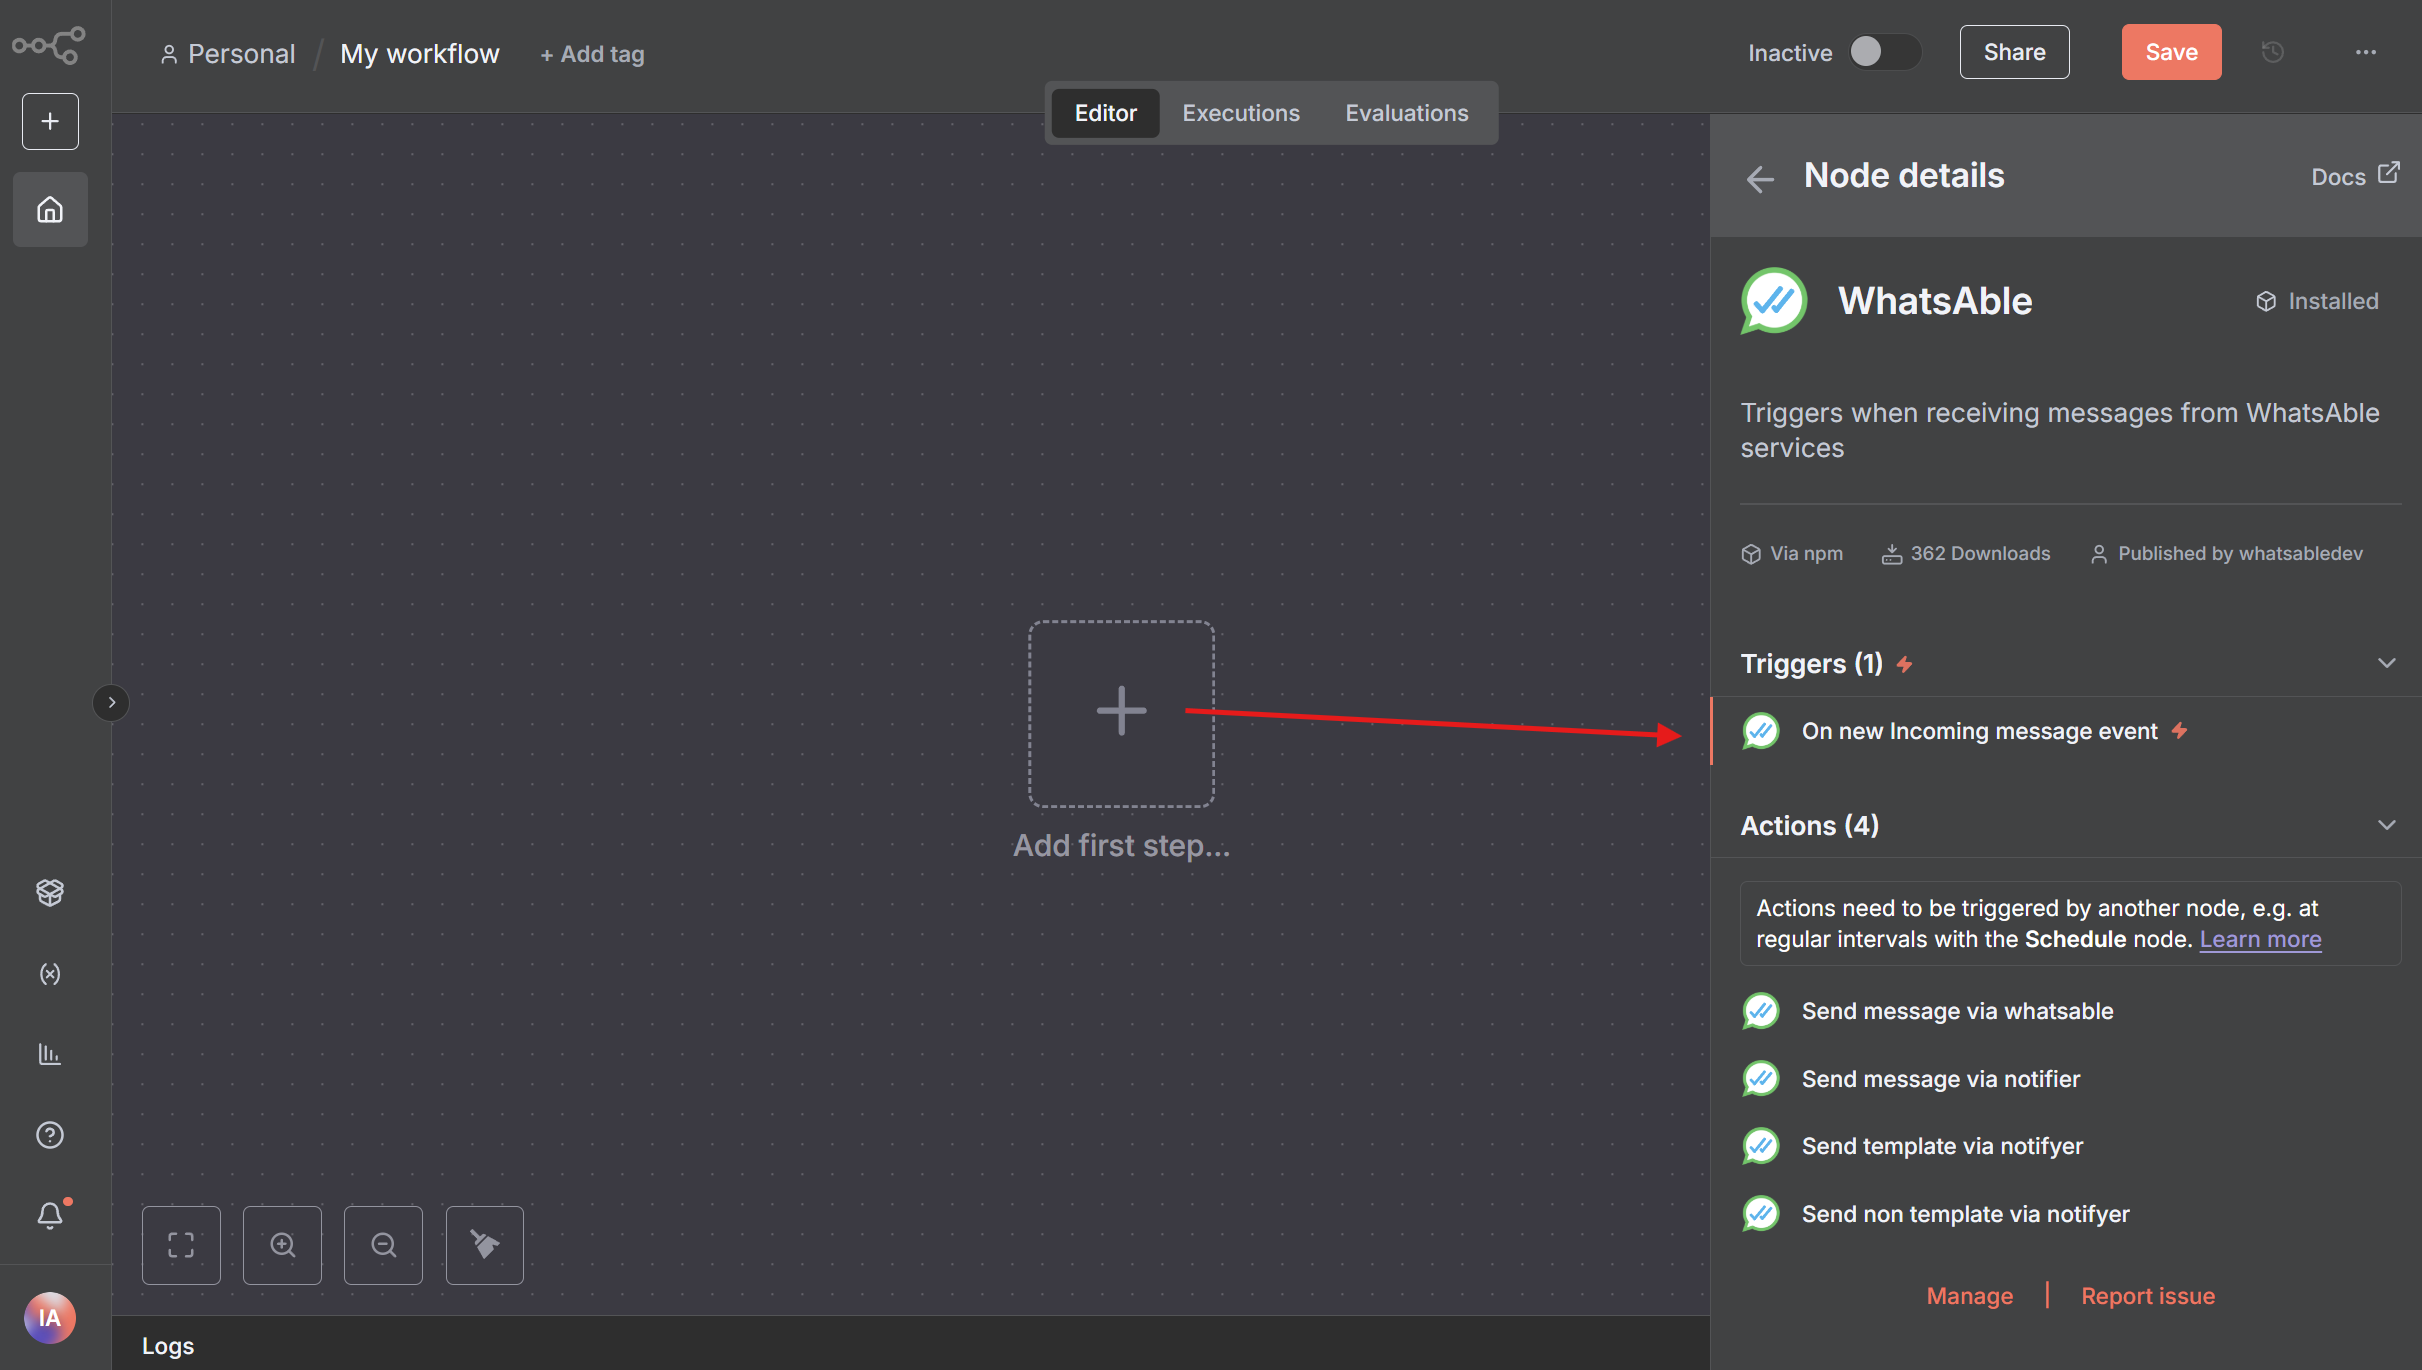
Adding the WhatsAble trigger labelled On new Incoming message event
Configure authentication credentials
- In the WhatsAble Trigger node parameters, locate the Webhook URLs section at the top
- Select Production URL and copy the generated URL by clicking on it
- Store this URL securely as you’ll need it for the credential setup
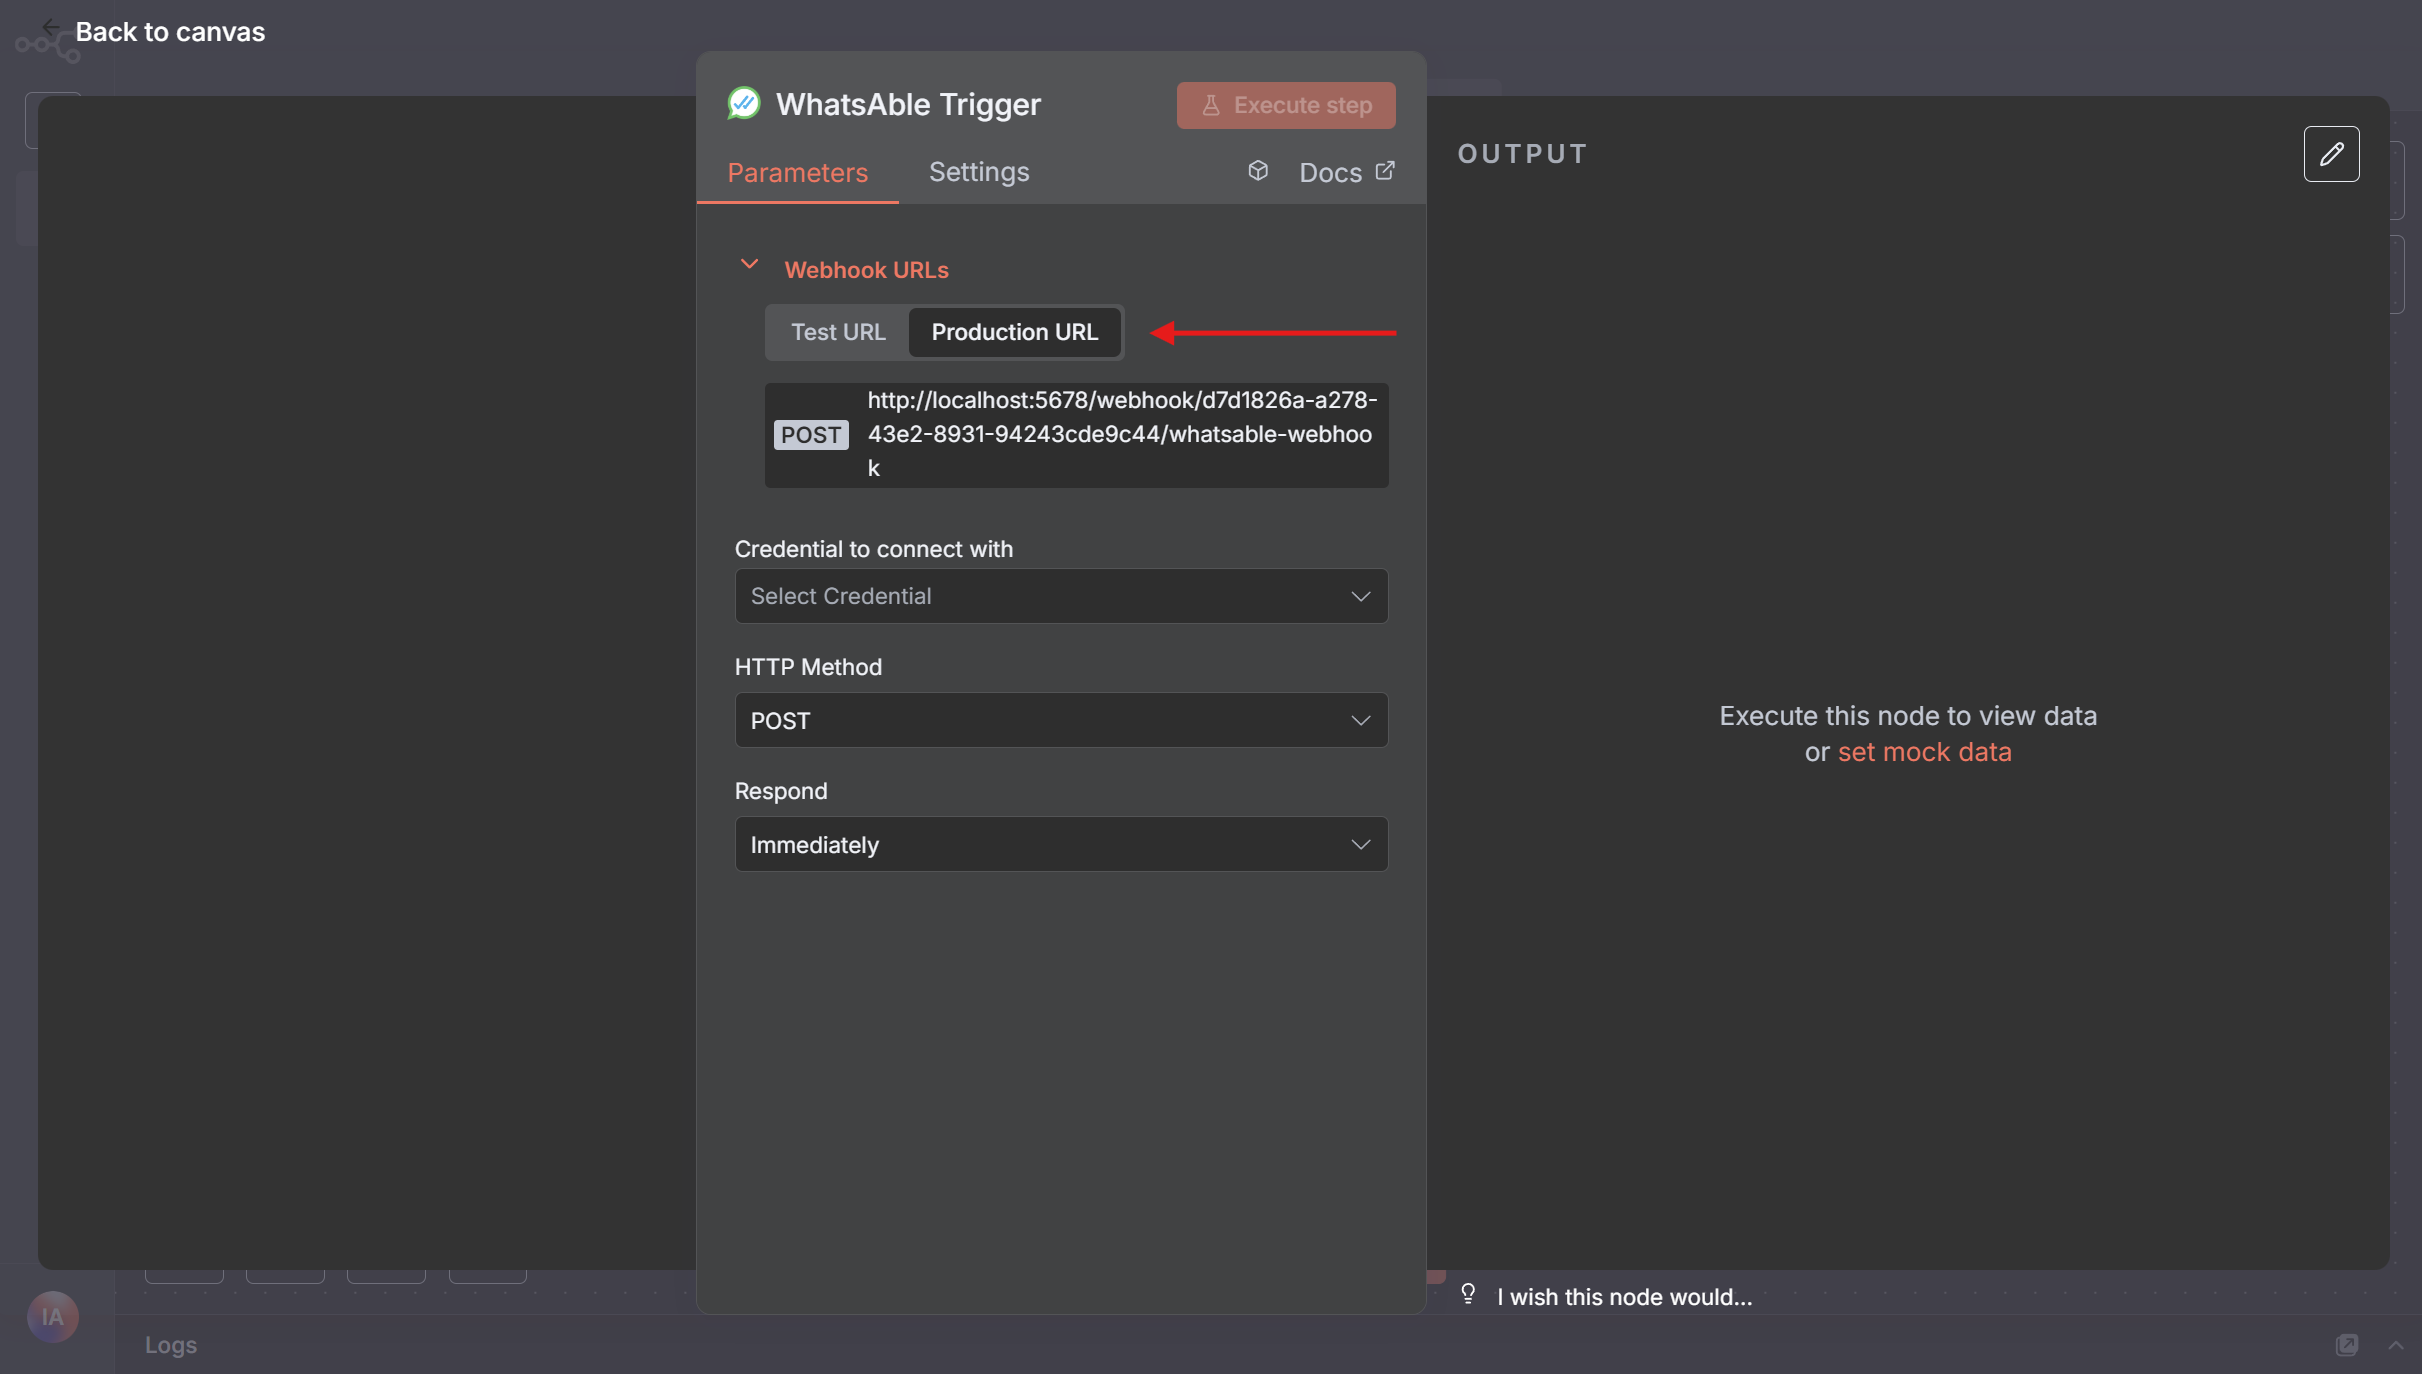
Copying the Production URL for webhook configuration
- In the Credential to connect with dropdown, click + Create new credential
- Select WhatsAble Notifyer System API as your connection method. For phone-app and inbox replies, choose the credential that covers Notifyer System incoming and outgoing messages
- Enter your Notifyer System API key in the API Key field
- Paste the Production URL you copied earlier into the Production URL field
- Assign a descriptive name to your credential (e.g., “WhatsAble Production”)
- Click Save to securely store your credentials
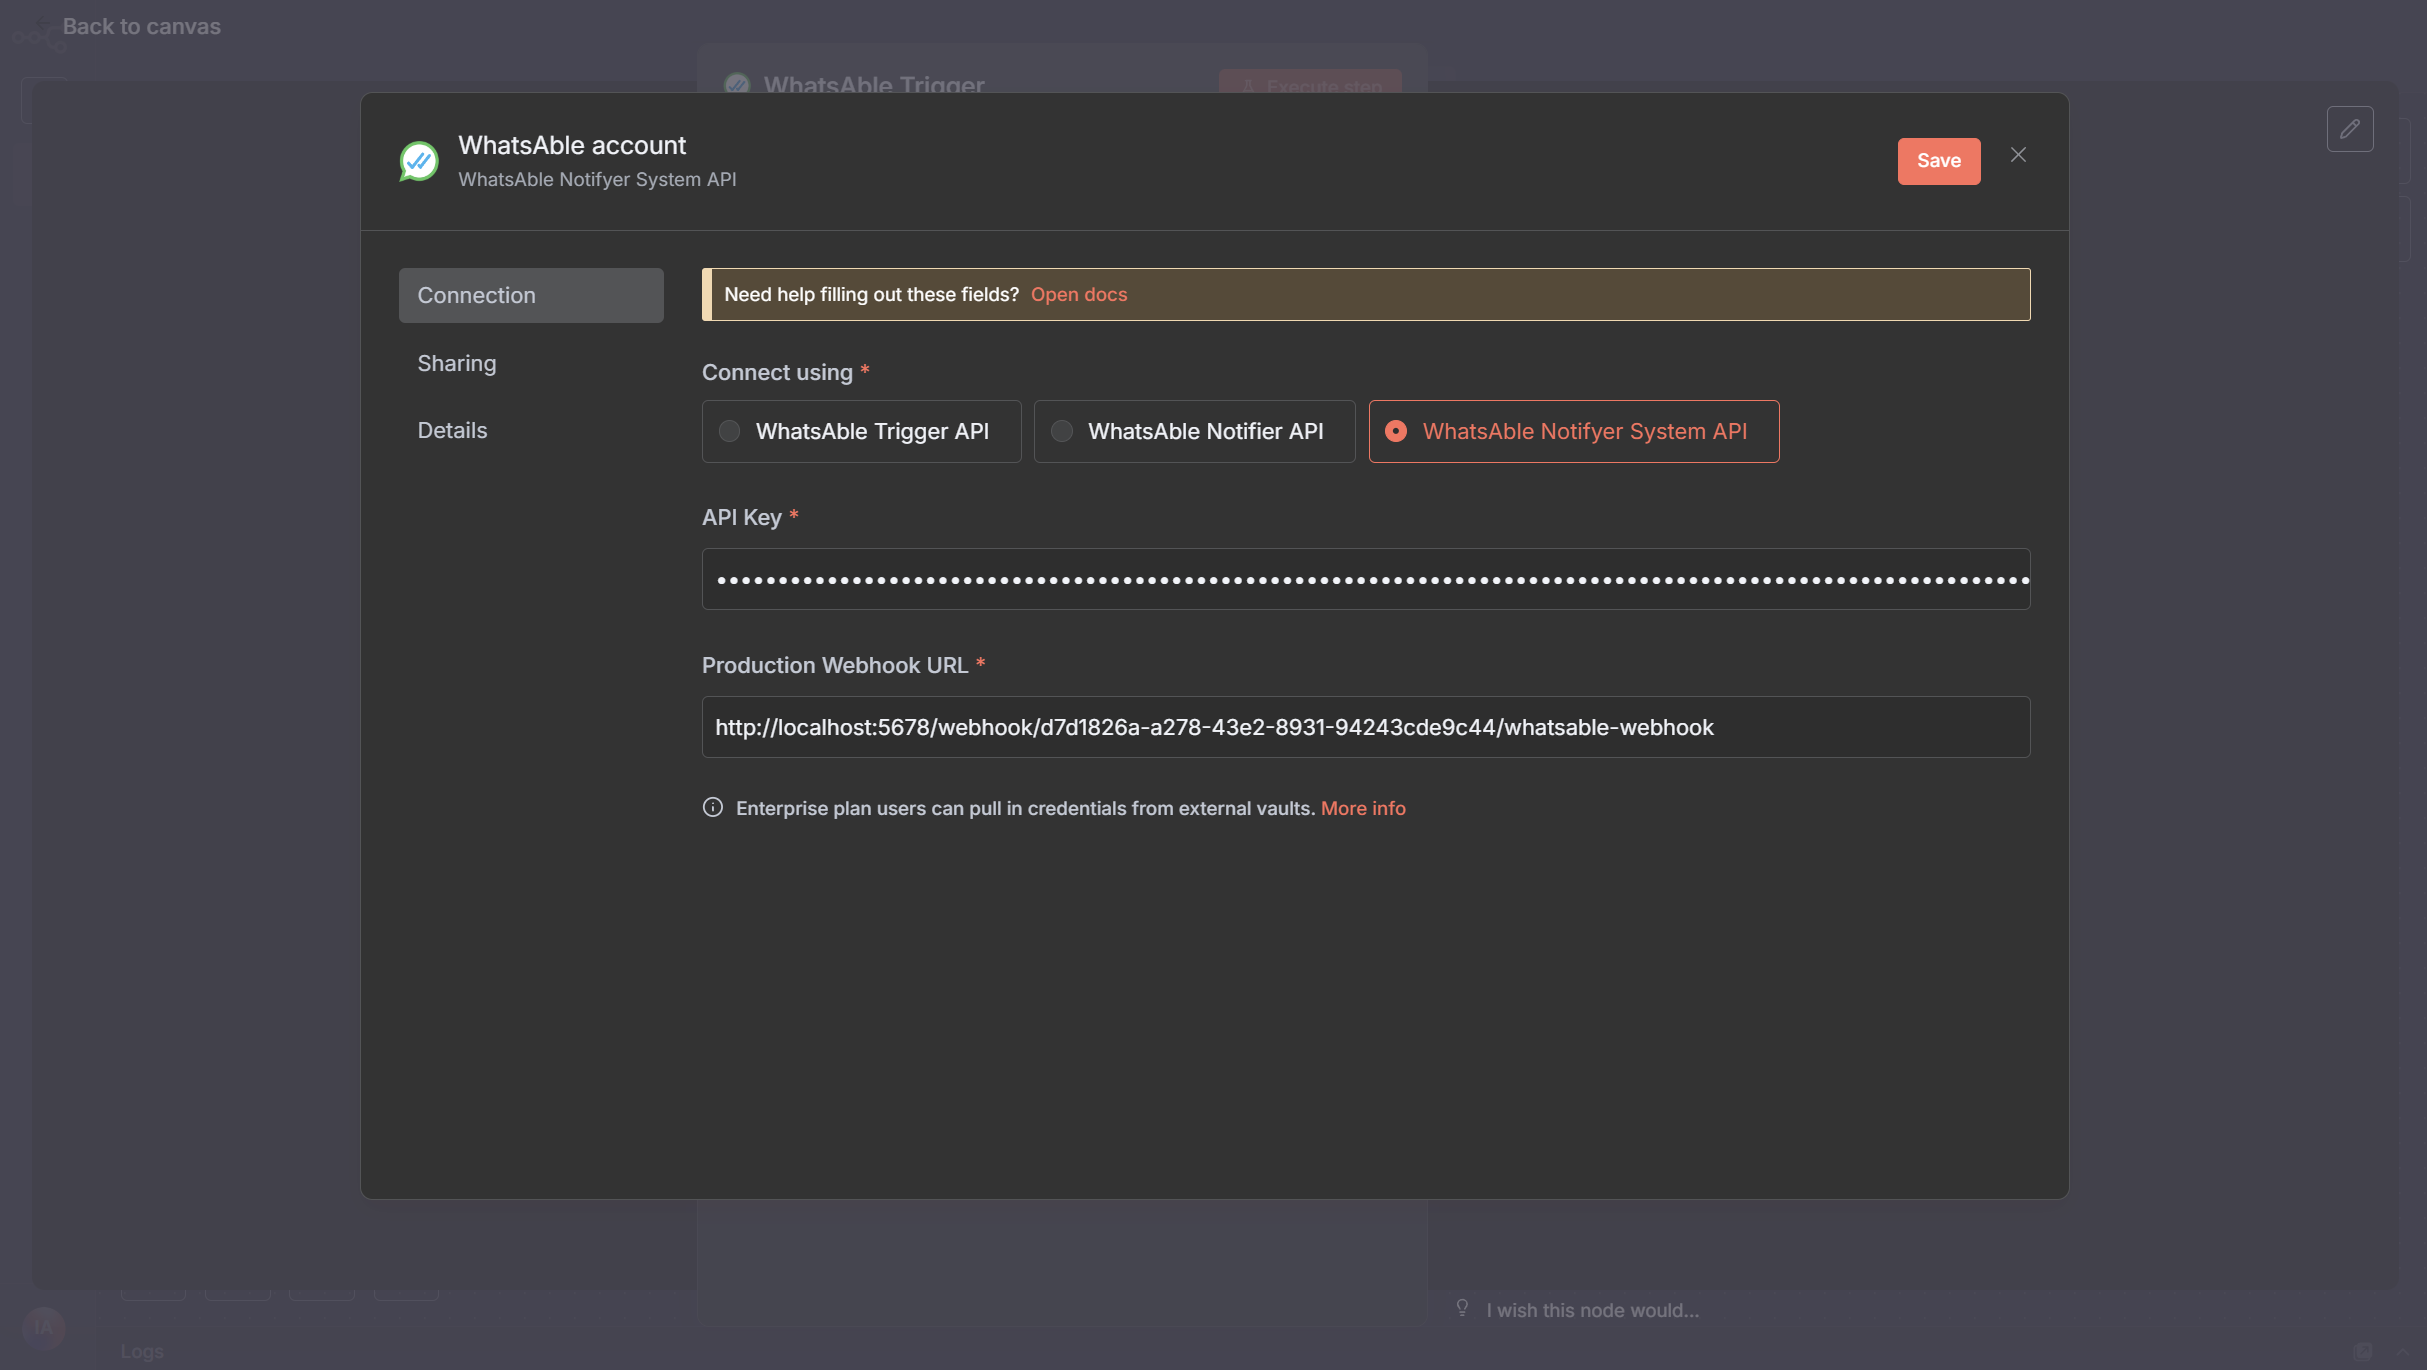
Credential configuration for WhatsAble Trigger node
Test and activate workflow
- In the Respond dropdown, select your preferred response timing:
- Immediately: Responds as soon as the trigger fires
- When Last Node Finishes: Waits for the entire workflow to complete before responding
- Click Execute step on the WhatsAble node to run a test
- Verify the connection is working by checking for a success confirmation
- Review any error messages if the test fails and adjust your configuration accordingly
incoming_message, send_by, and was_message_by_human in later nodes to branch on direction and sender.Add the Notifyer System node
- Click the + button after your trigger node
- Search for “WhatsAble” in the nodes panel
- Select the node with the official WhatsAble logo
- After selecting the WhatsAble node, choose ‘Send template via Notifyer’ or ‘Send non-template via Notifyer’ as needed.
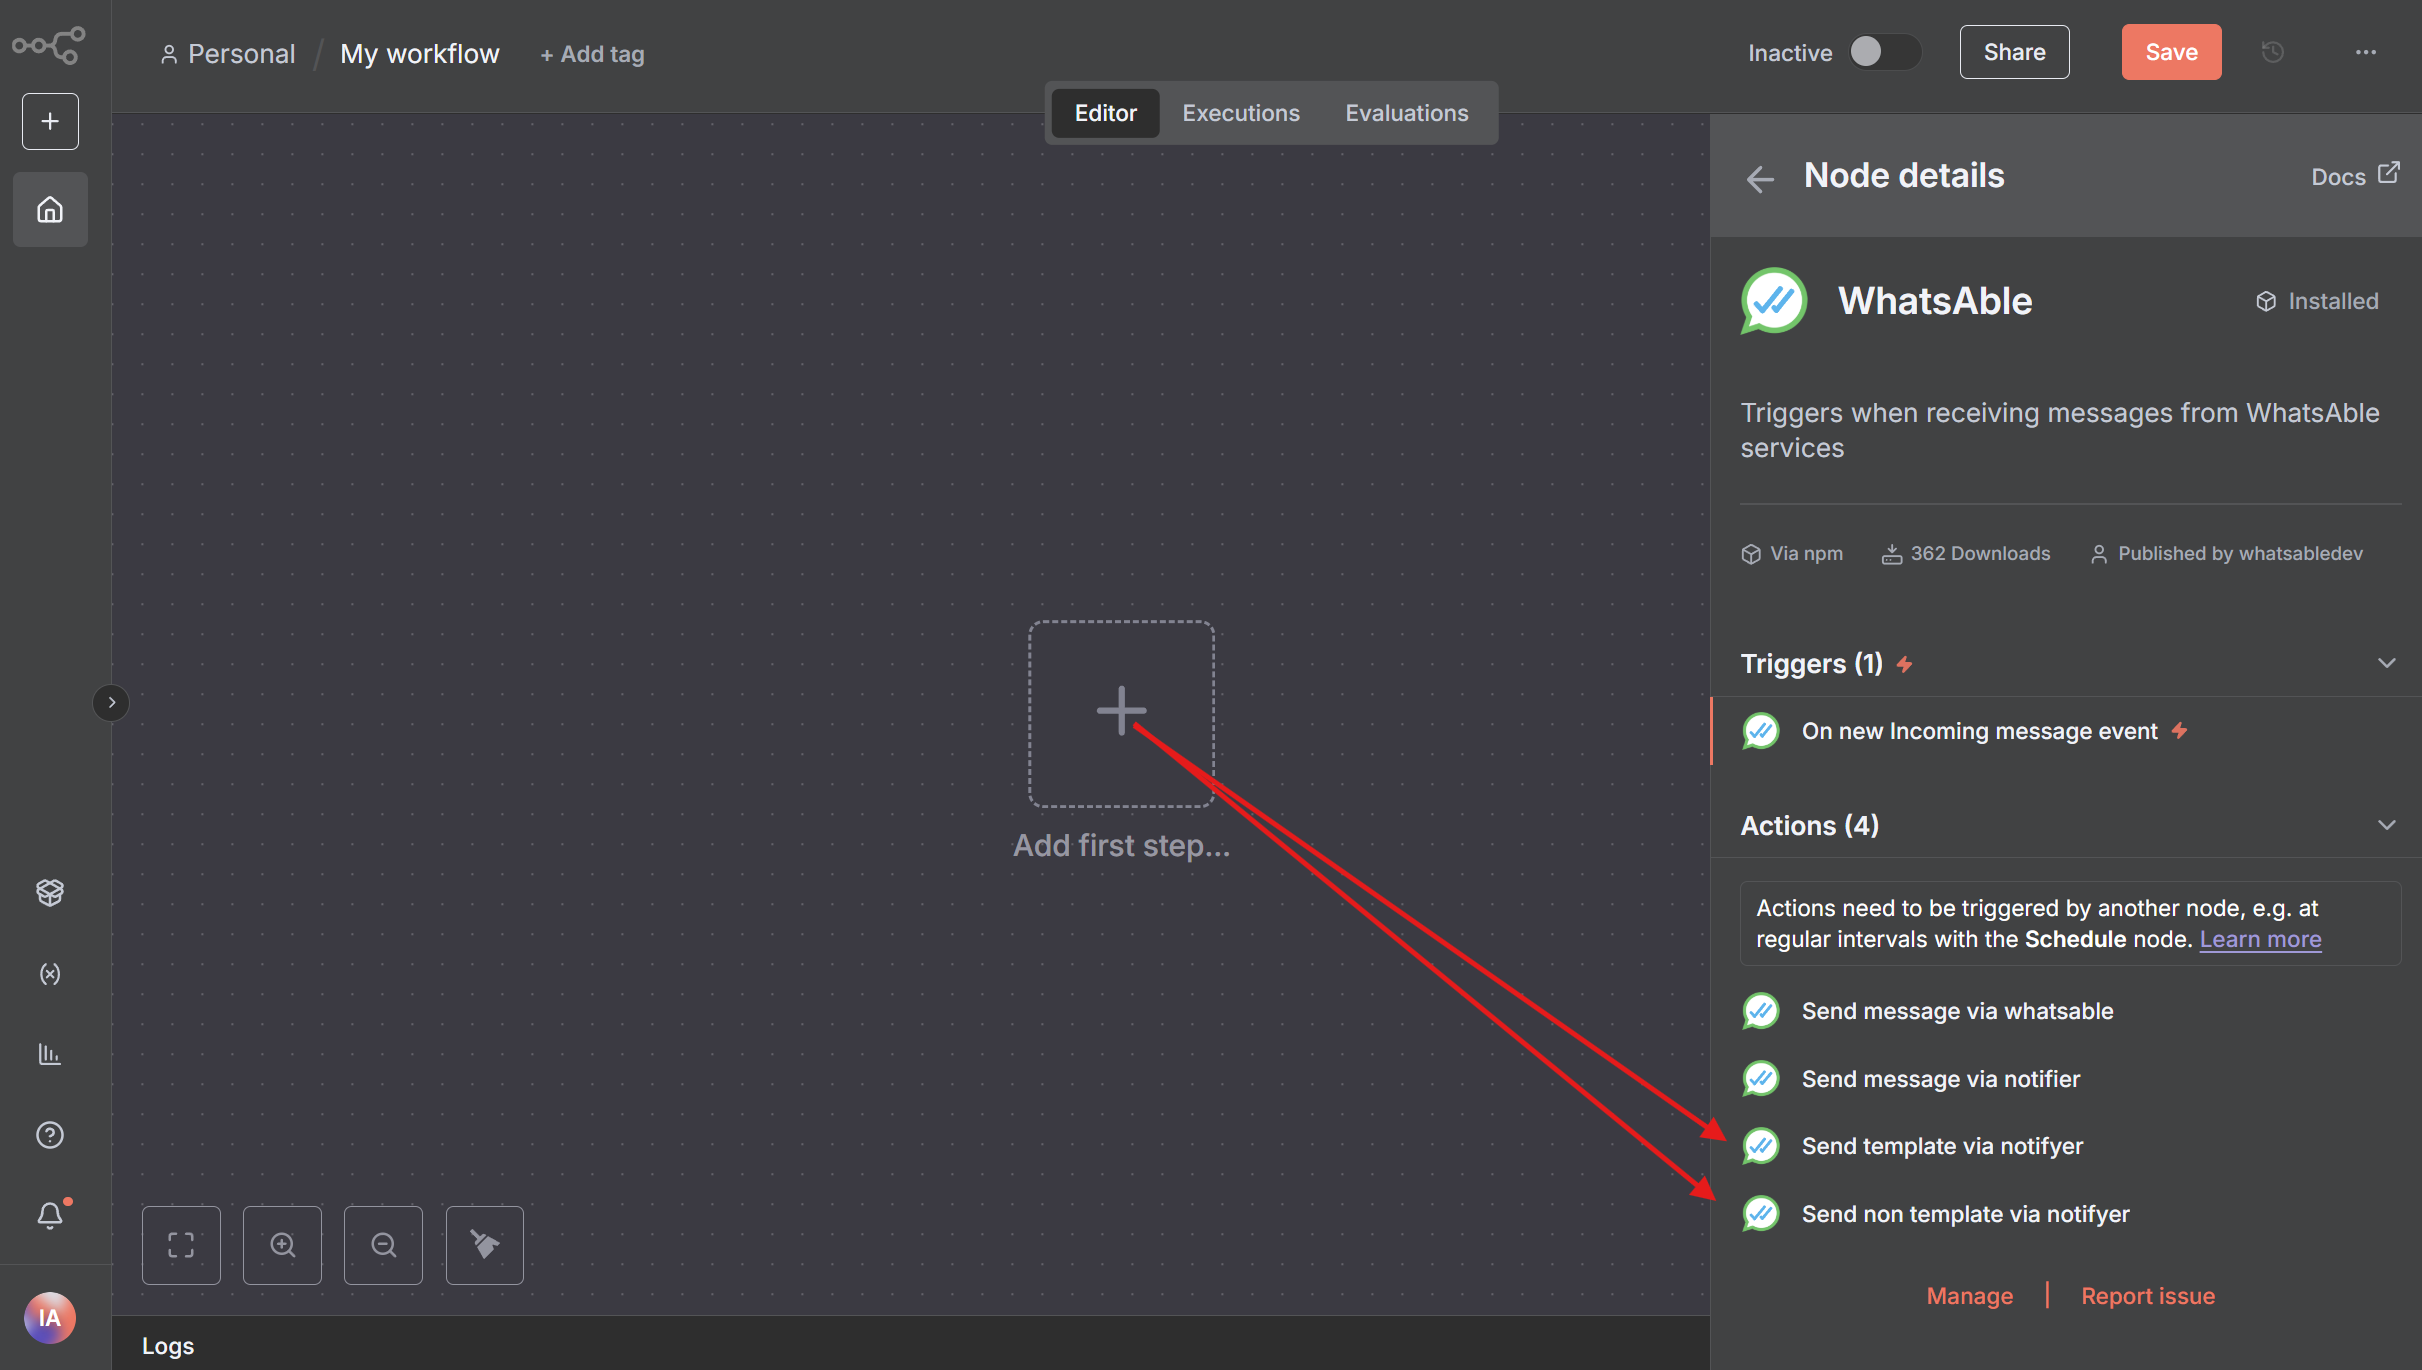
WhatsAble Node: Send Message via Send template via Notifyer / Send non-template via Notifyer
Configure Notifyer System credential
- In the WhatsAble node Parameters, find the Credential to connect with dropdown
- Select + Create new credential
- Enter your Notifyer System API key that you copied earlier
- Name your credential (e.g., “Notifyer Production”)
- Click Save to store your credential
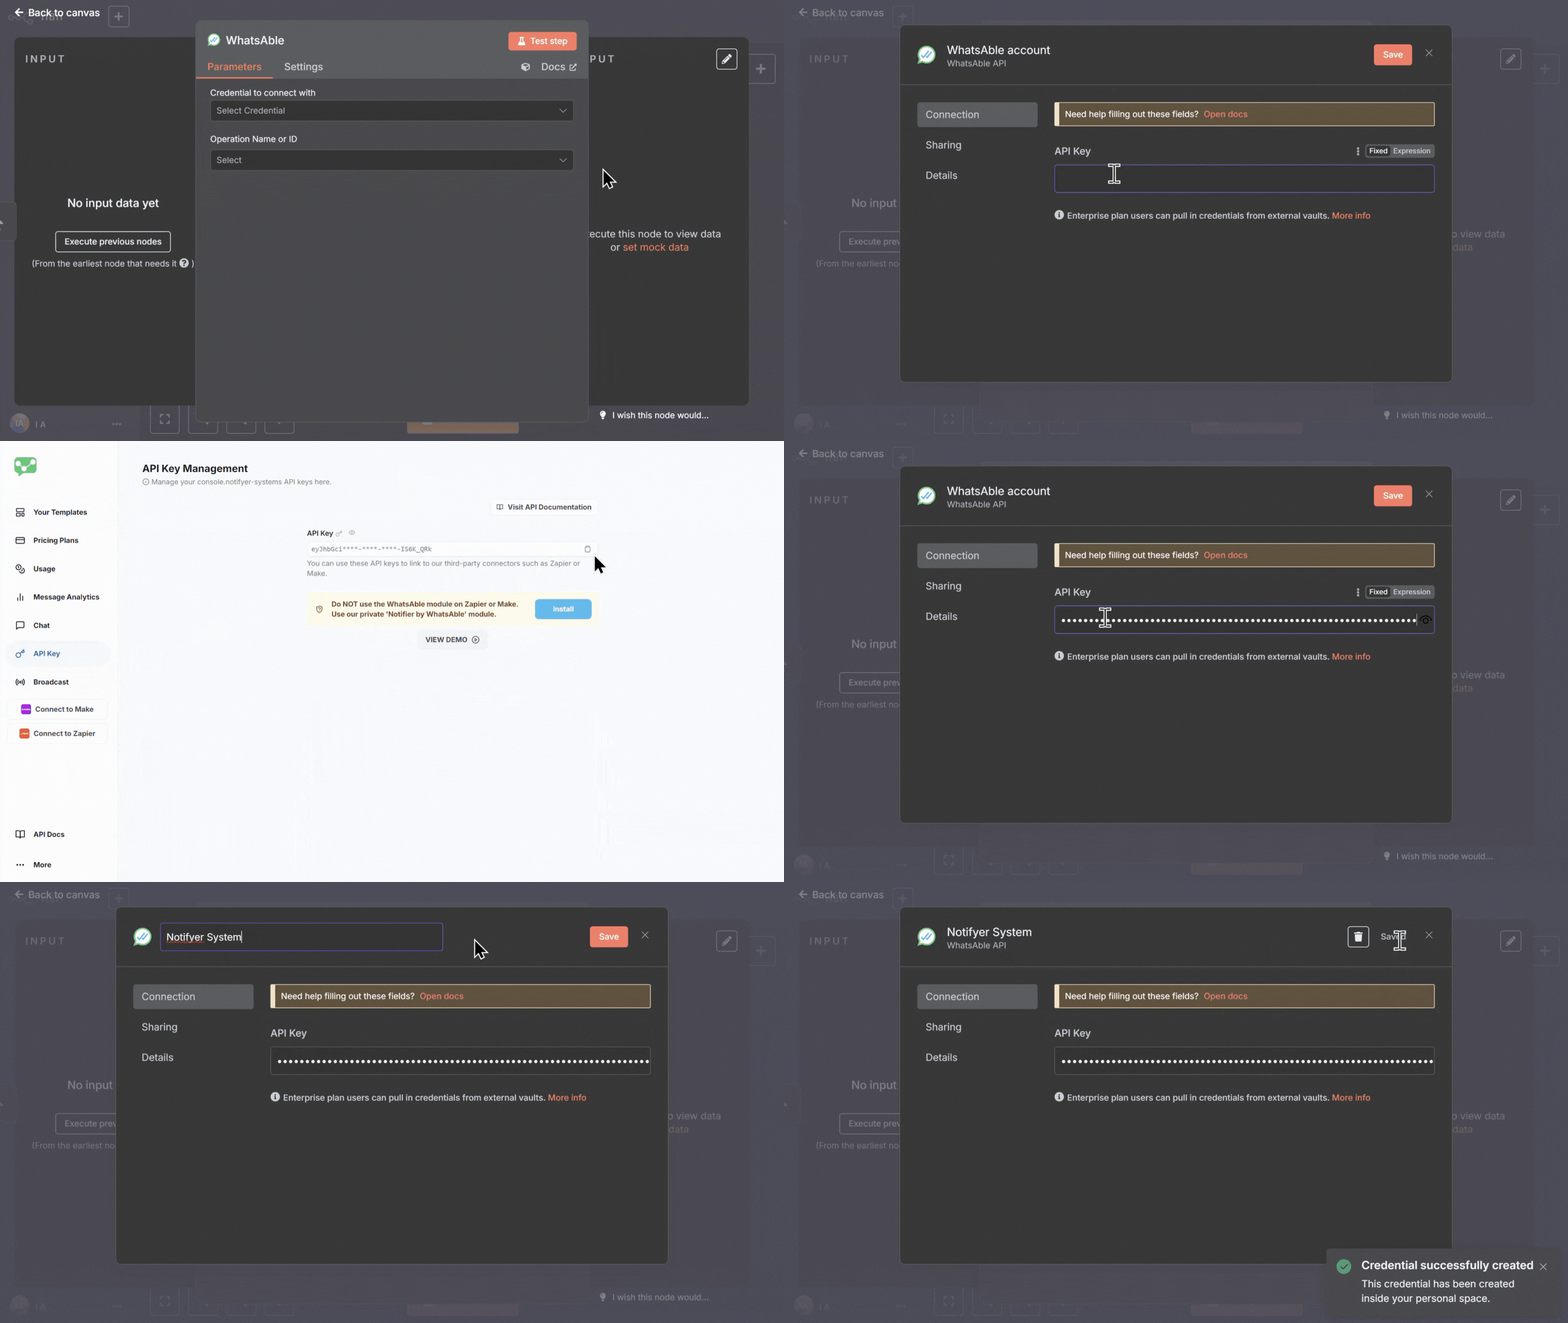
Configuring Notifyer System credential
Configure your message
- In Resource dropdown, select Send Message
- In the Operation dropdown, choose Send template via Notifyer for template messages or Send non‑template via Notifyer for regular messages (only works within the 24‑hour window).
- Complete the required fields:
- Operation: Send template via Notifyer
- Operation: Send non-template via Notifyer
Configure message
- For text messages: Enter your message content
- For media messages: Provide a publicly accessible URL to your file
- Optional caption (for media files)
Test and activate your workflow
- Click Test Step on the Notifyer node to verify it’s working correctly
- If the test is successful, you’ll see a confirmation message
- Return to your workflow
- Click Save to save your entire workflow
- Toggle the Active switch in the top-right corner to activate your workflow
Incoming and outgoing WhatsApp messages
Notifyer delivers both incoming and outgoing messages to your webhook or automation trigger — including messages typed by hand in the WhatsApp Business app on your phone. This is possible because Notifyer supports Meta WhatsApp Coexistence. You keep using WhatsApp Business on your phone; those hand-typed replies still reach an external webhook and can start an automation. They are not limited to the Notifyer web inbox.Trigger n8n (or any webhook) from WhatsApp messages — including replies typed in the WhatsApp Business app
Direction, sending system, and team member
Use these three fields to tell what happened and who sent it:true when a contact sent a message to your business. false when your business sent a message to the contact (outgoing). Filter on this field to run logic only for one direction.true when a person sent the message (WhatsApp Business app or Notifyer chat inbox). false when a bot or automation sent it. Combine with send_by to see both whether a human sent it and which teammate or system did.Example payload: message typed on the phone
This is the JSON Notifyer POSTs when someone types a reply in the WhatsApp Business app.incoming_message is false, send_by is "WhatsApp App", and was_message_by_human is true.
last_message_of_bot is the last message your business sent — whether a human typed it in the WhatsApp Business app or the Notifyer inbox, or a bot/automation sent it. last_messages is a JSON string of the last ~20 messages (parse it before iterating). phone_number may arrive as a number rather than a string.Click-to-WhatsApp ad attribution
When a contact messages you after tapping a Click-to-WhatsApp ad (Facebook, Instagram, or WhatsApp Status), Meta includes areferral object on that inbound event. Notifyer forwards it in webhook and trigger data (n8n, Make, Zapier).
Use it to see which ad, creative, and platform produced the lead — then label the chat, route it, or send ctwa_clid back to Meta for campaign optimization.
referral is typically present on the first inbound message after the ad click. Later messages in the same conversation usually omit it. Persist ctwa_clid and source_id as soon as you see them.entry[].changes[].value.messages[].referral. Full field reference and a complete example: Message webhooks — Click-to-WhatsApp ads.
Example use cases
Order confirmations
Appointment reminders
Click-to-WhatsApp ads
referral.source_id, source_url, and headline to label leads by creative and platformCustomer support
Delivery updates
Payment reminders
Best practices
Test thoroughly
Test thoroughly
Use templates
Use templates
Add personalization
Add personalization
Follow WhatsApp policies
Follow WhatsApp policies
Monitor performance
Monitor performance
Troubleshooting
Messages not sending?
Messages not sending?
Verify API key
Check phone numbers
Check subscription
Outgoing events from the WhatsApp Business app
incoming_message is false and send_by is WhatsApp App when you type a test reply on your phone. You do not need to delete the WhatsApp Business app.Template errors?
Template errors?
Variable check
Format verification
Template name
Media not displaying?
Media not displaying?
URL access
File format
File size
- Images: up to 5MB
- Videos: up to 16MB
- Documents: up to 100MB