Notifier Integration with Zapier

Automate your WhatsApp messaging workflows with Zapier and Notifier
Prerequisites
Before getting started, make sure you have:Notifier Account
Zapier Account
Set up your Notifier account
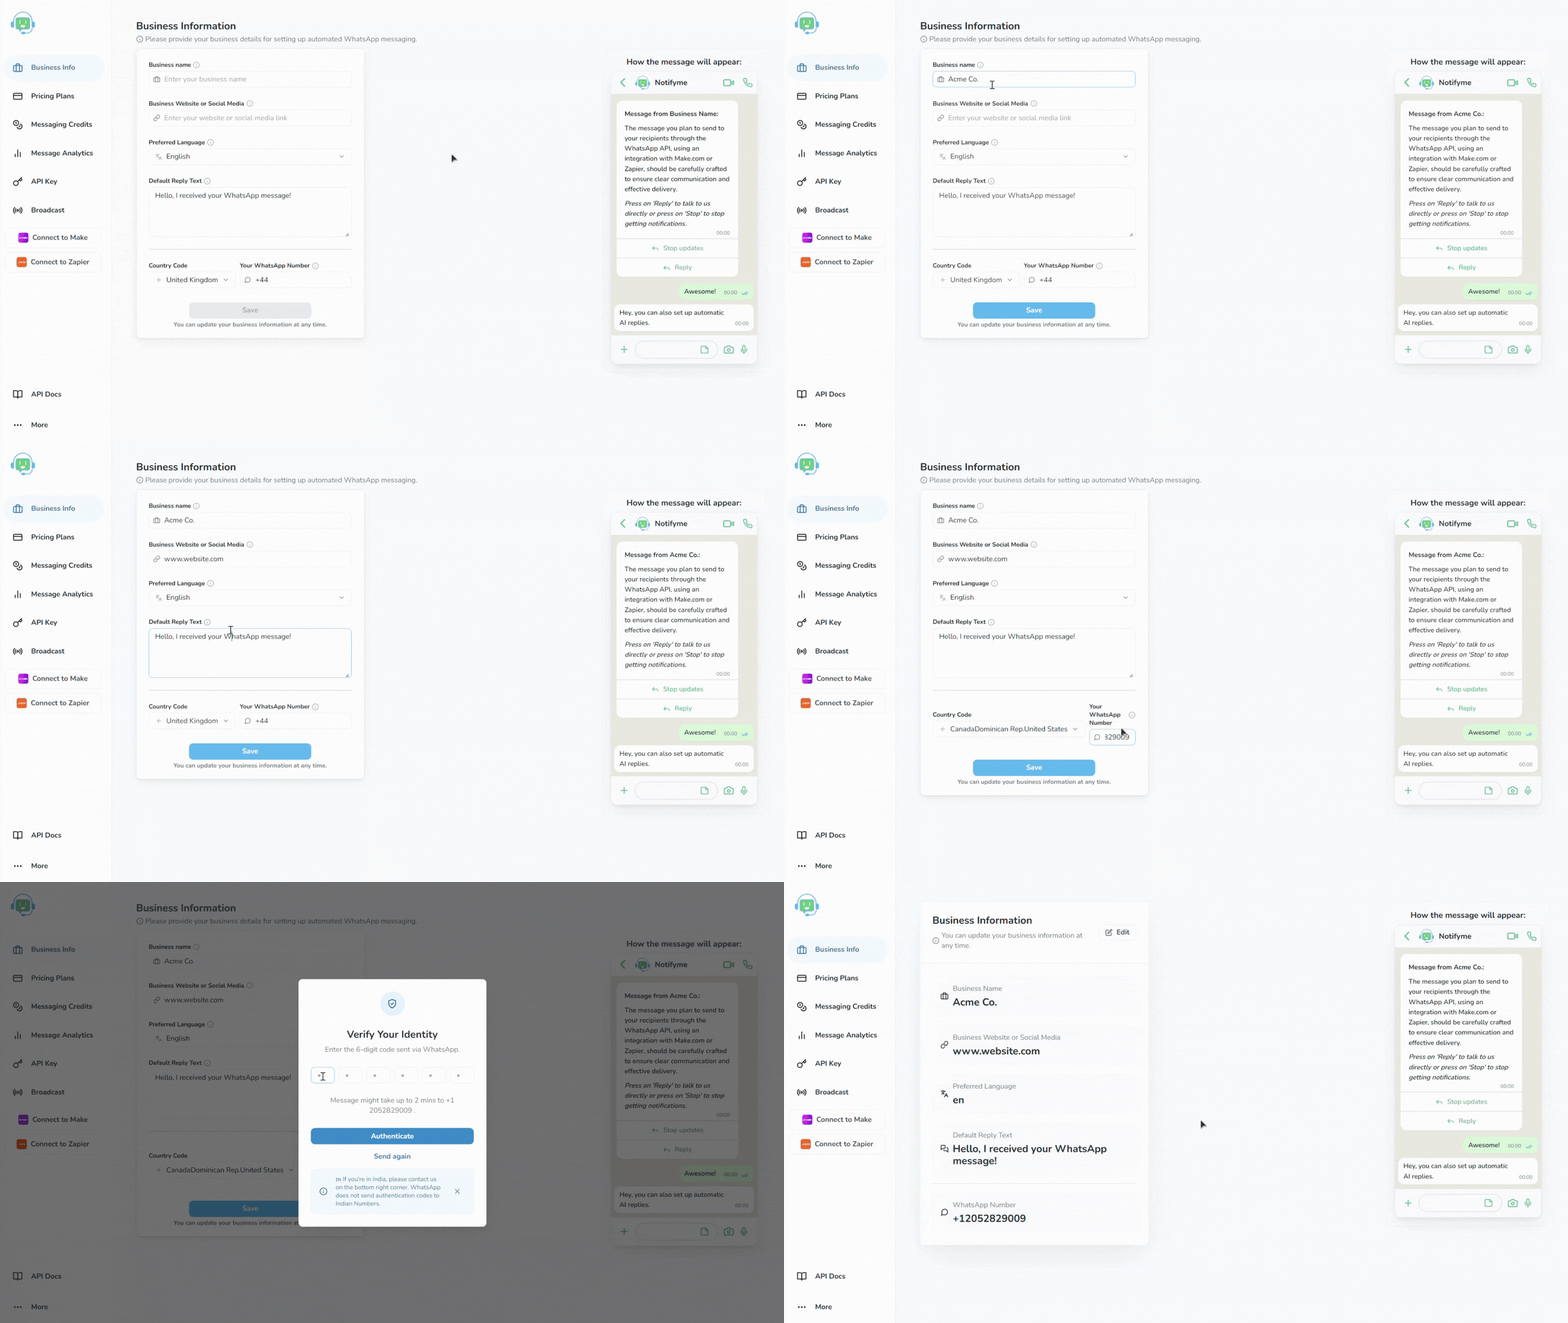
Configure your business information
- Log in to your Notifier dashboard
- Navigate to Business Information
- Complete all required fields:
- Business Name: Enter the name that will appear in messages sent to recipients
- Business Website or Social Media: Add your website or social media URL
- Preferred Language: Select the language for standard WhatsApp message elements
- Default Reply Text: Create a template message that appears when recipients click “Reply”
- WhatsApp Number: Add your business WhatsApp number where replies will be directed

Configuring business information
Get your API key
- In your Notifier dashboard, go to API Keys
- Copy your unique API key
- Store it securely—you’ll need it for the integration
Connect Notifier to Zapier
Now that you have your Notifier account configured, let’s connect it to Zapier to automate your messaging workflows.Connect Notifier to Zapier
- Log in to your Zapier account
- Navigate to Notifier dashboard and select Connect to Zapier in the side menu
- Click Continue in the connection guide popup
- Select Accept & Build a Zap on the invitation page
Set up your Zapier Zaps
- Log in to your Zapier account
- Create a new workflow/Zap by clicking + Create and select Zaps/New Zap
- Add a trigger step of your choice:
- Popular triggers include Google Forms, Jotform, ClickUp, or a Schedule trigger
- Connect and configure your trigger according to your use case

Setting up Zapier Zaps
Add the Notifier app
- Select the next Action step or click the + button to add a new step
- Search for “Notifier by WhatsAble” in the apps and tools library
- Select the app with the official Notifier logo

Adding the Notifier app
Configure Notifier credentials
Credential Setup
Credential Setup
- In the Notifier app Setup, select Send WhatsApp Message in the Action event dropdown
- Click Sign In in the Account field and you will be prompted to enter your API Key
- Enter your Notifier API key that you copied earlier
- Click Yes, Continue to Notifier to store your credential
- Next, click the Continue button in the Setup screen to proceed to the Configure section

Configuring Notifier credentials
Test and activate your Zap
- Click Continue and then click Test step in the Test to verify it’s working correctly
- If the test is successful, you’ll see a confirmation message
- Click Publish to save your entire Zap
- Toggle the Active switch in the top-left corner to activate your Zap
Example use cases
Customer Onboarding
Order Notifications
Appointment Reminders
Lead Follow-up
Support Ticket Updates
Workflow Diagram
Sample Notifier Zapier Workflow
Best practices
For optimal results when using Notifier with Zapier:Personalize your messages
Personalize your messages
Keep messages concise
Keep messages concise
Test thoroughly
Test thoroughly
Monitor performance
Monitor performance
Respect privacy
Respect privacy
Troubleshooting
Message not being sent?
Message not being sent?
Check account status
Verify business information
Confirm API key
Validate phone number
Formatting issues in messages?
Formatting issues in messages?
Review template
Variable formatting
Message length