Notifyer System Integration with Make

Prerequisites
Before getting started, make sure you have:Notifyer System Account
Active Notifyer System account with a subscription plan (Monthly or Pay-as-you-go)
Make Account
Access to Make workflow automation platform
Setting up your Notifyer System account
Complete the Embedding Process
Before sending WhatsApp messages, you must complete the platform embedding process, which connects your WhatsApp Business account to Notifyer System.
The embedding process is required by Meta to ensure proper business verification and compliance with WhatsApp Business Platform policies.
Set up message templates
Notifyer System provides two methods for sending WhatsApp messages:
Option A: Template messages
Option A: Template messages
WhatsApp templates are pre-approved message formats that allow for personalization while maintaining compliance with WhatsApp policies.
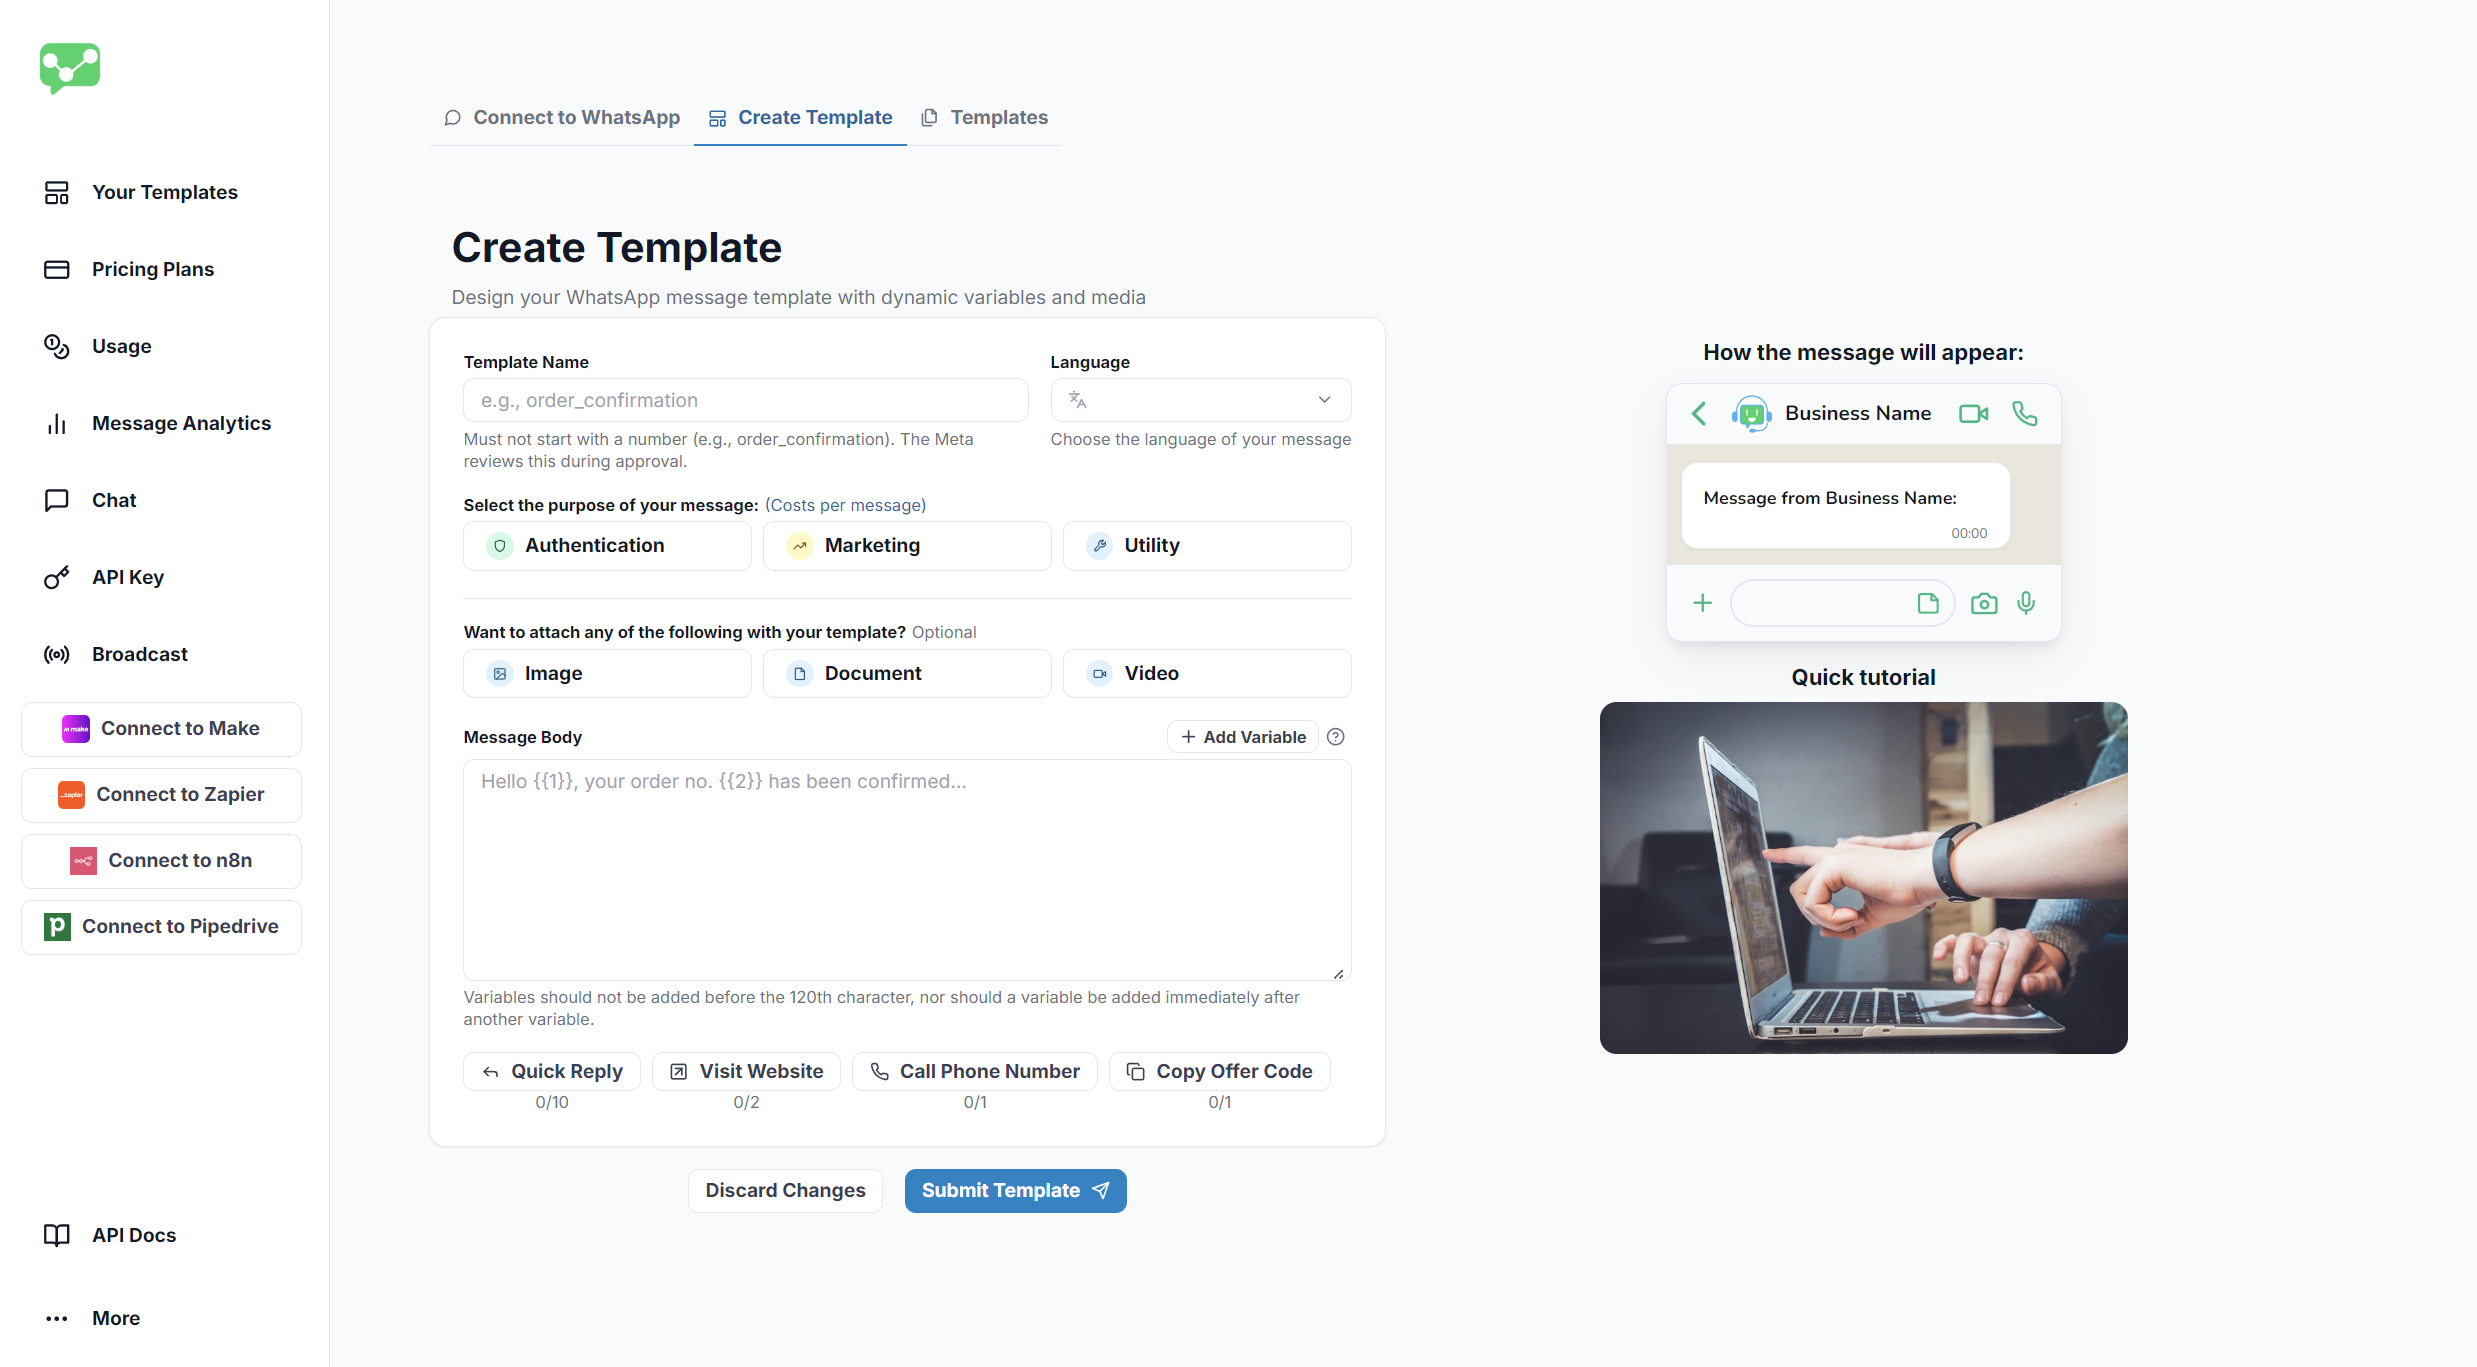
Fill out the form
Complete the template creation form with the following details:
Choose a descriptive name for internal reference
Choose your template’s primary language
Select the appropriate message category
Optional: Add an image, document, or video header
Craft your message content
Add placeholders using
{{1}}, {{2}} format for personalizationOptional: Configure call-to-action buttons
Option B: Non-template messages
Option B: Non-template messages
For simpler communications, you can send non-template messages that include:
Text
Plain text messages within the 24-hour window
Images
Photos and graphics in supported formats
Documents
PDFs, Word docs, and other file types
Videos
MP4 and other supported video formats
Non-template messages can only be sent within the 24-hour customer service window after a customer initiates contact with your business.
Get your API key
To connect Notifyer System with Make, you’ll need an API key: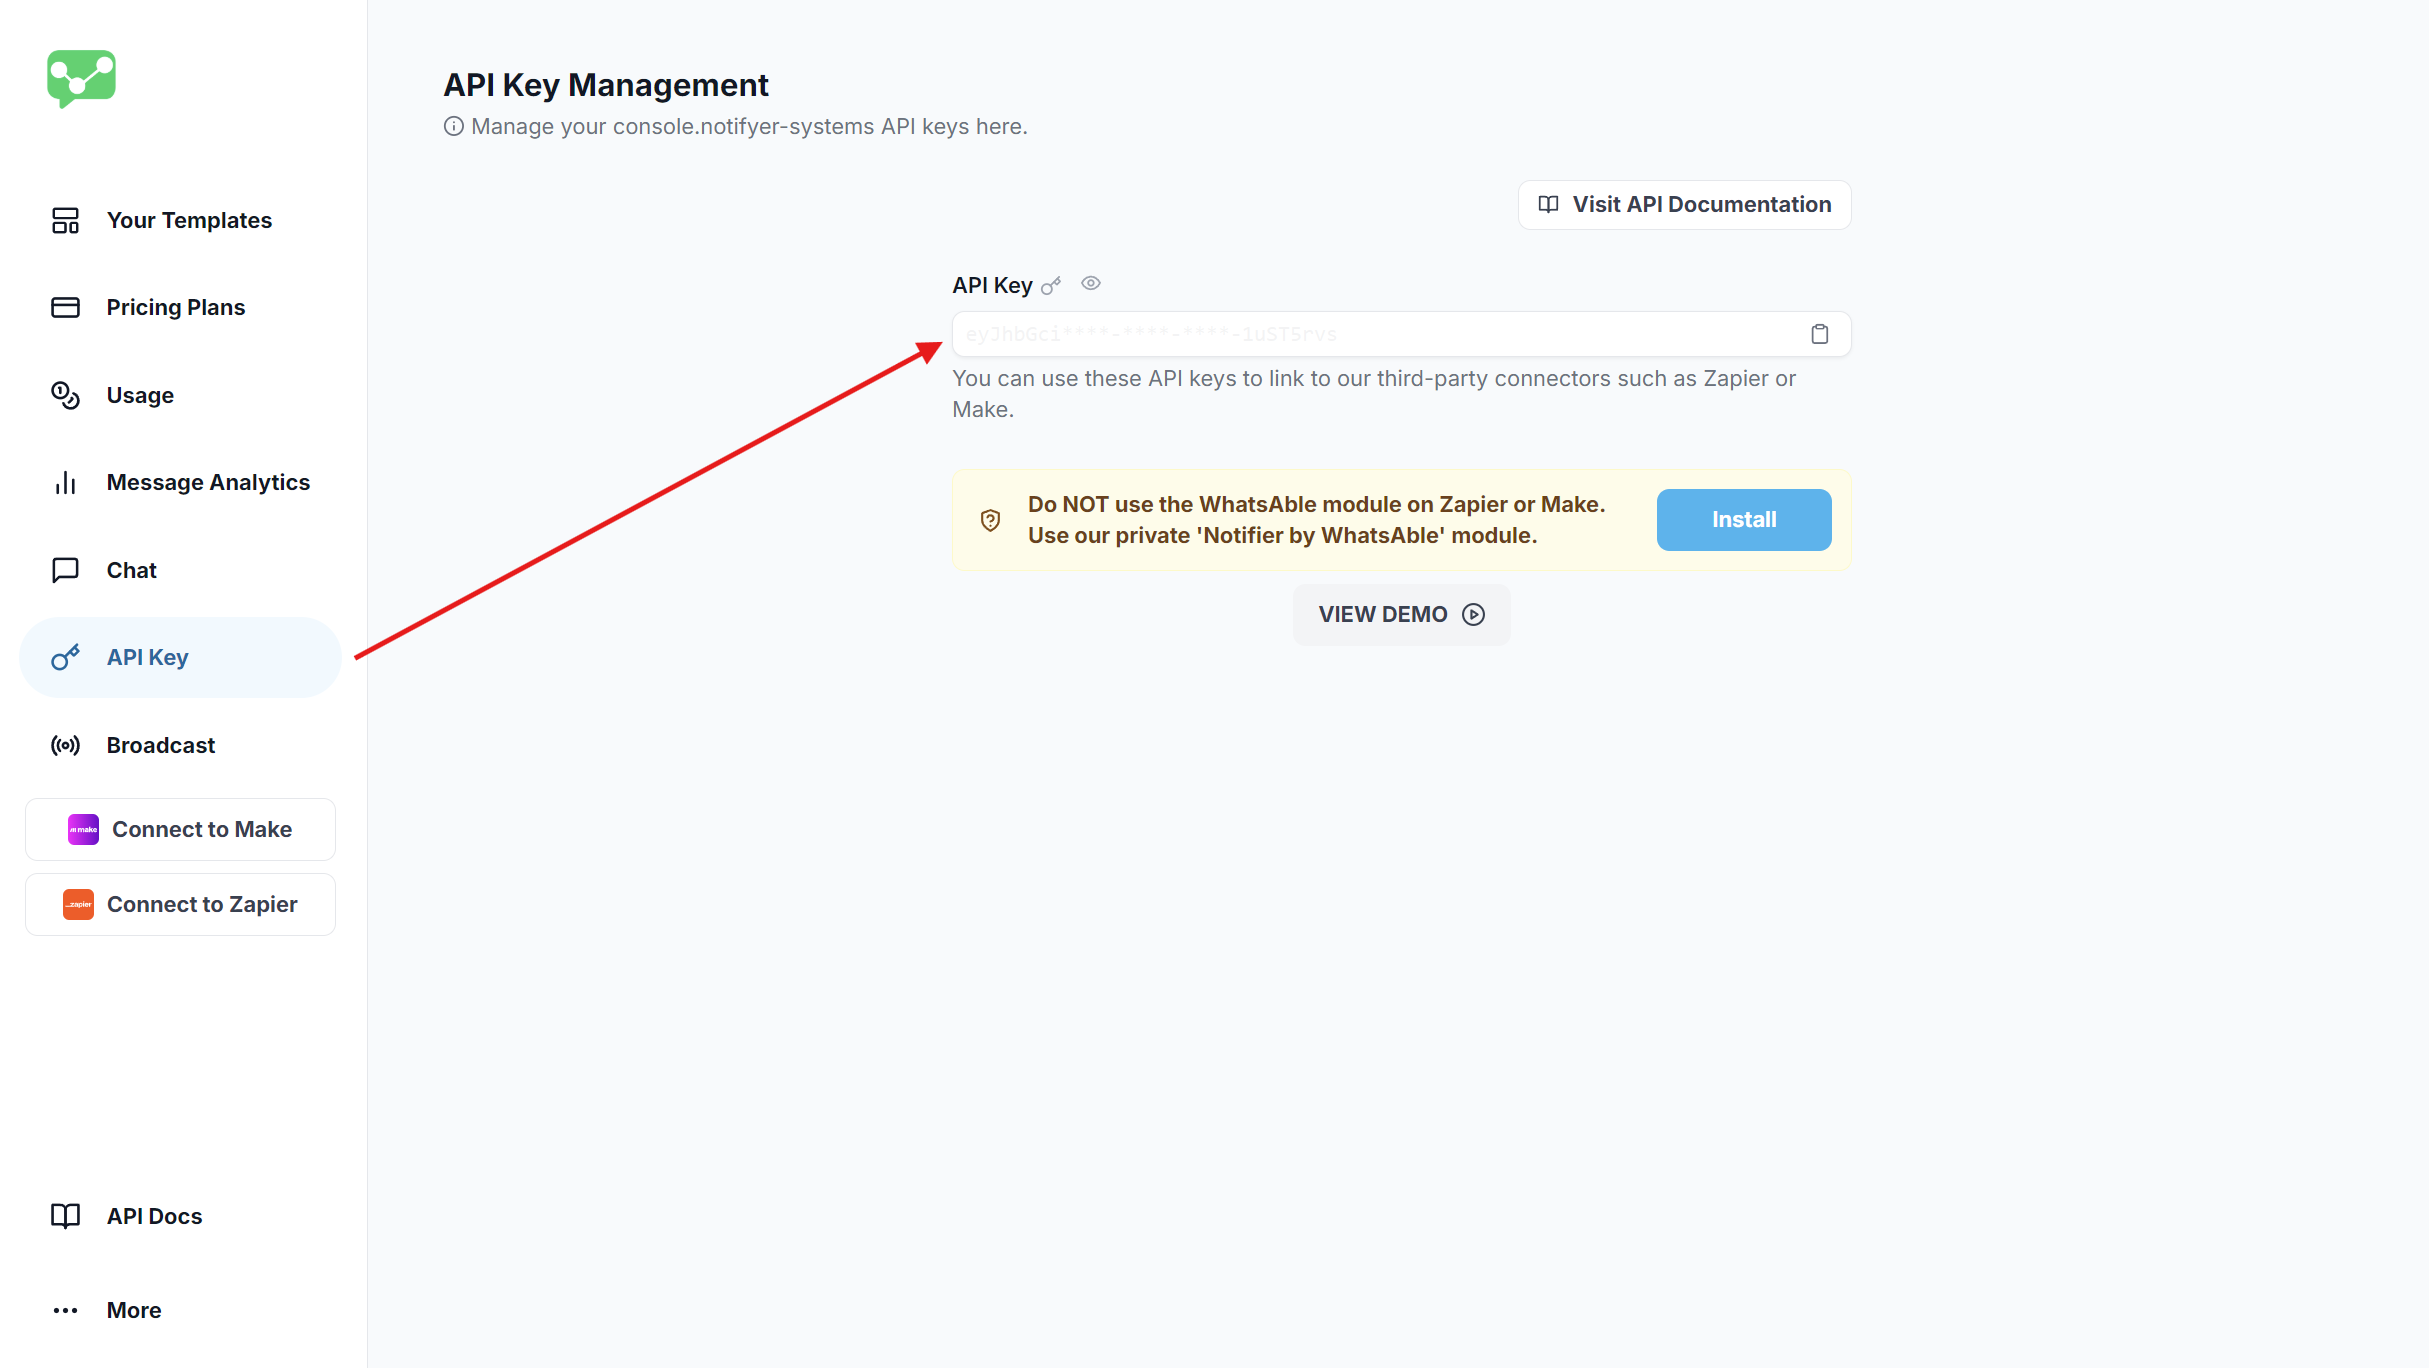
- In your Notifyer dashboard, navigate to API Keys
- Copy your unique API key
- Store it securely—you’ll need it for the integration
Connect Notifyer System to Make
Now that you have Notifyer System set up, let’s connect it to Make to automate your scenarios.Install Notifyer System in Make
- Log in to your Make account
- Navigate to Notifyer System dashboard and select Connect to Make in the side menu
- Click Continue in the connection guide popup
- Click Install, select your organization at the bottom of the screen, then click Install again. (Note: You need Admin, Owner, or App Developer role in your organization to install apps.)
You’re now ready to create scenarios with the Notifyer System app
Set up your Make Scenario
- Log in to your Make account
- Create a new scenario by clicking + Create a new scenario
- (Optional) Add a trigger module of your choice:
- Popular triggers include Google Forms, Jotform, ClickUp, or a Schedule trigger
- Connect and configure your trigger according to your use case
Add the Notifyer System module
- Click the + button to add a new module
- Search for Notifyer System in the apps or modules library
- Select the module with the official Notifyer System logo

Configure Notifyer System credentials
Credential Setup
Credential Setup
- Once you click on Notifyer System module, select ‘Send a WhatsApp Message with Your Template’ or ‘Send a WhatsApp Message without Template’ from the ACTIONS
- Click Create a connection in the Connection section of Notifyer System module and you will be prompted to enter your API Key
- Enter your Notifyer System API key that you copied earlier
- Rename your connection name if needed
- Click Save to store your credential

Configure your message
Depending on your messaging needs, choose one of the following operations:
- Send a WhatsApp Message with Your Template
- Send a WhatsApp Message without Template
Complete the required fields:
Enter the recipient’s phone number with country code (e.g., +1234567890) or use dynamic data from previous nodes
Select from your pre-approved templates in the dropdown
Enter publicly accessible media URL for Media (image/video/document) header.
This field will only appear if you have a Media (image/video/document) header configured in your selected template.
Fill in values for each variable in your template, mapping them to dynamic data when applicable
Add note for internal tracking. This data won’t be sent to the recipient
Select label(s) for internal tracking. This data won’t be sent to the recipient

Test and activate your scenario
- Click Save to save your message configuration
- Right click on the WhatsAble module and select Run this module only to verify the module is working correctly
- or click Run once in the bottom-left corner of the screen to test the entire scenario
- If the test is successful, you’ll see a confirmation message
- Click Save icon in the bottom-left corner to save your scenario (You can also set timer intarval for the scenario)
- Toggle the Active switch in the bottom-left corner with time to activate your scenario
Example use cases
Order confirmations
Send automatic order confirmations when new orders are placed
Appointment reminders
Schedule reminders before upcoming appointments
Lead notifications
Alert your sales team when new leads come in
Customer support
Route support inquiries to the appropriate team member
Delivery updates
Keep customers informed about their delivery status
Payment reminders
Send automatic payment reminders for overdue accounts
Best practices
Test thoroughly
Test thoroughly
Always test your workflows with test phone numbers before activating them for production use.
Use templates
Use templates
Whenever possible, use pre-approved templates for better deliverability and compliance.
Add personalization
Add personalization
Include customer names and specific details to increase engagement and response rates.
Follow WhatsApp policies
Follow WhatsApp policies
Ensure all message content complies with WhatsApp Business policies to avoid account restrictions.
Monitor performance
Monitor performance
Regularly check your message delivery rates in your Notifyer dashboard.
Troubleshooting
Messages not sending?
Messages not sending?
Check phone numbers
Confirm phone numbers are in the correct international format (e.g., +14155552671)
Template errors?
Template errors?
Need help?
Our support team is ready to assist you:Email support
Contact team@whatsable.app
Schedule a demo
Book a personalized walkthrough
Live chat
Click the green chat button in the bottom right corner of the Notifyer System dashboard
For additional automation platform integrations (Make.com, Zapier, etc.), please contact our support team or check our integration documentation.